Bookish DIY: Bookends
I’m in the midst of planning a move across town, and I’ve got my eye on doing a few DIY projects to get ready for my new place. I’m hoping that this means I’ll have less to pack in terms of craft supplies, even if it means more in terms of finished items.
We’ve talked sewing projects, book bags, and Christmas decorations. This time around, we’re talking bookends. Added bonus: a trip to the home improvement store!
The “L”
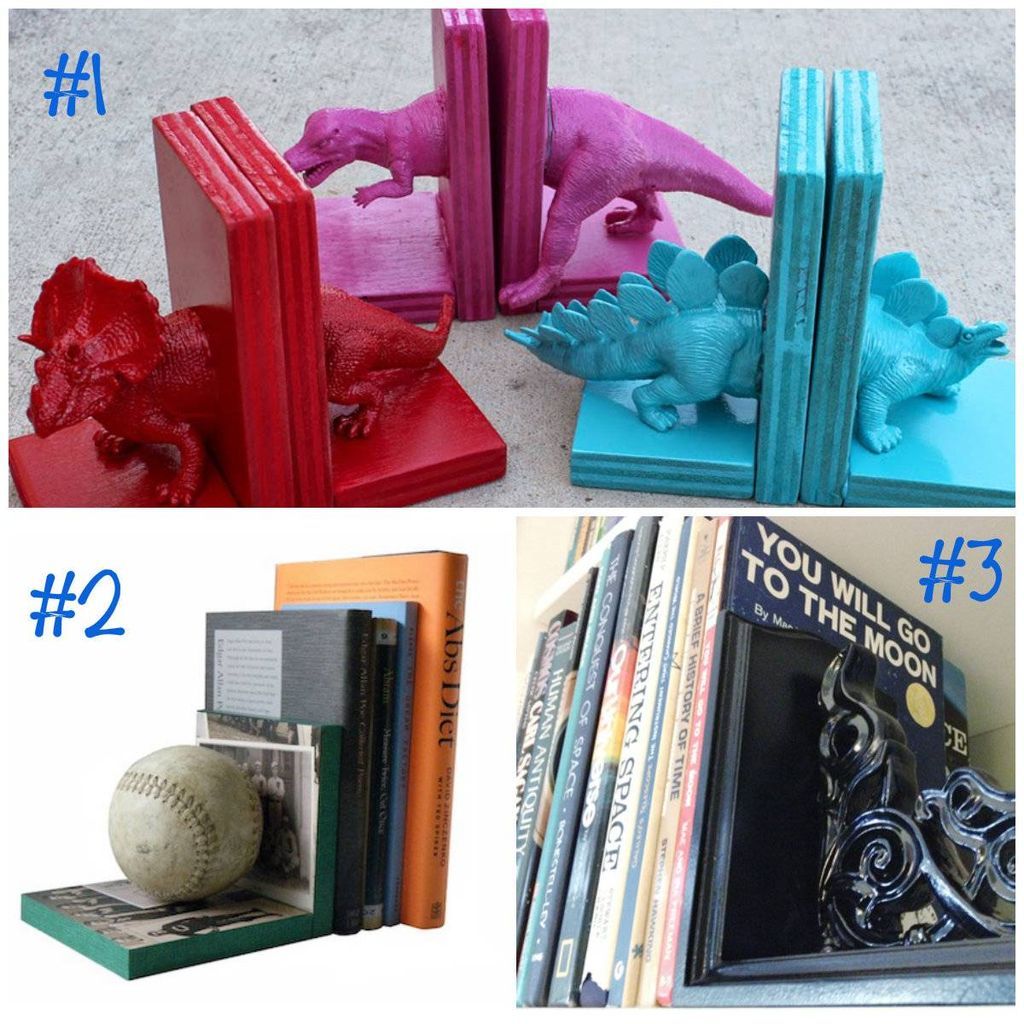
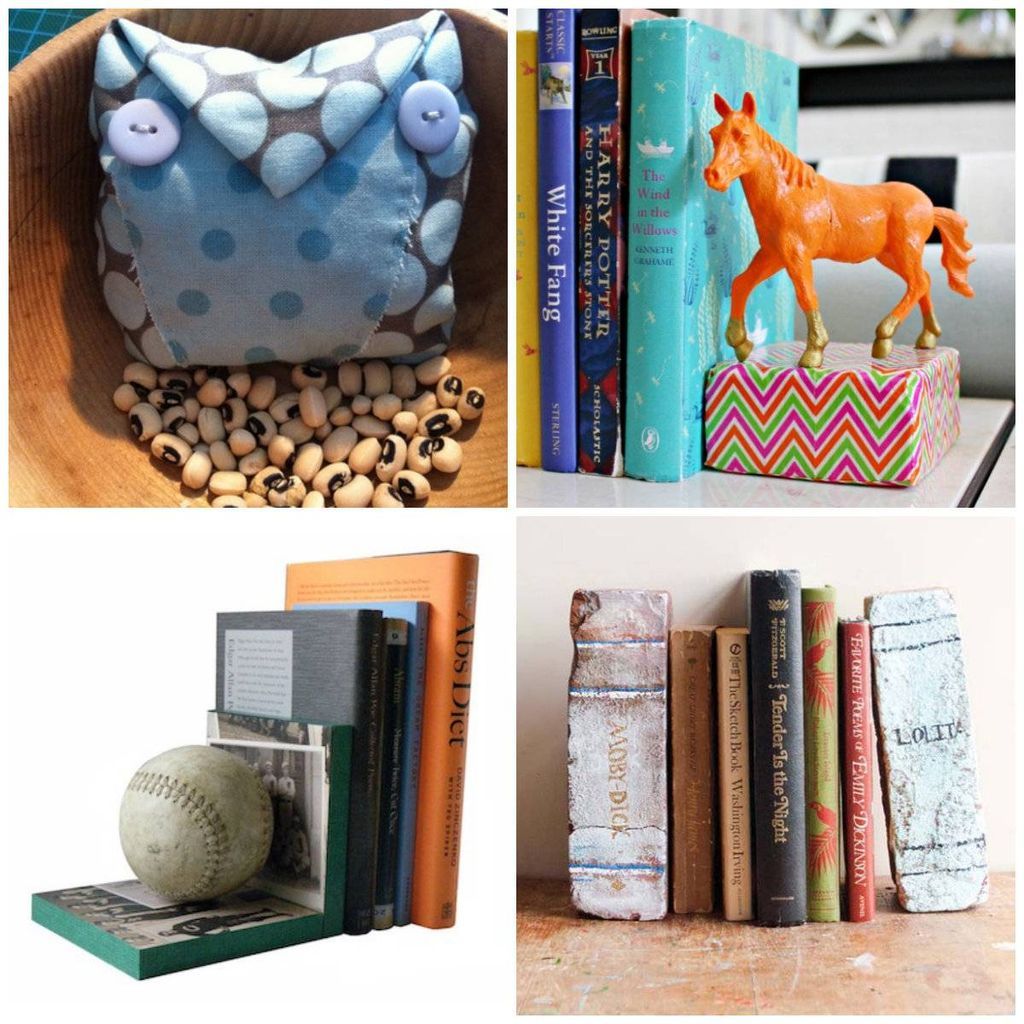
The classic bookend shape – the “L”. It’s as simple as nailing together two pieces of wood (scraps work nicely in this case), doing a little painting, and spending some quality time with your hot glue gun. Here are couple of more specific suggestions:
1. Dinosaur bookends from the Doodlecraft
2. Baseball bookends from Mod Podge Rocks
3. “If it’s (a little too) Baroque, fix it!” from Rather Square
The Bean Bag
These bookends are a little more flexible in some ways and a little more durable in others. They just require some fabric, some very basic sewing skills, and a bag full of beans or rice. Which you choose depends on how firm you want your bookend to be. Here are a couple of creative options.
1. Funky fabric beanbags from J&O Fabrics Store (lots of cute variations here!)
2. HGTV Canada has an excellent and easy-to-follow simple bean bag tutorial.
3. These Russian-inspired bookends were featured on The Guardian
The Brick
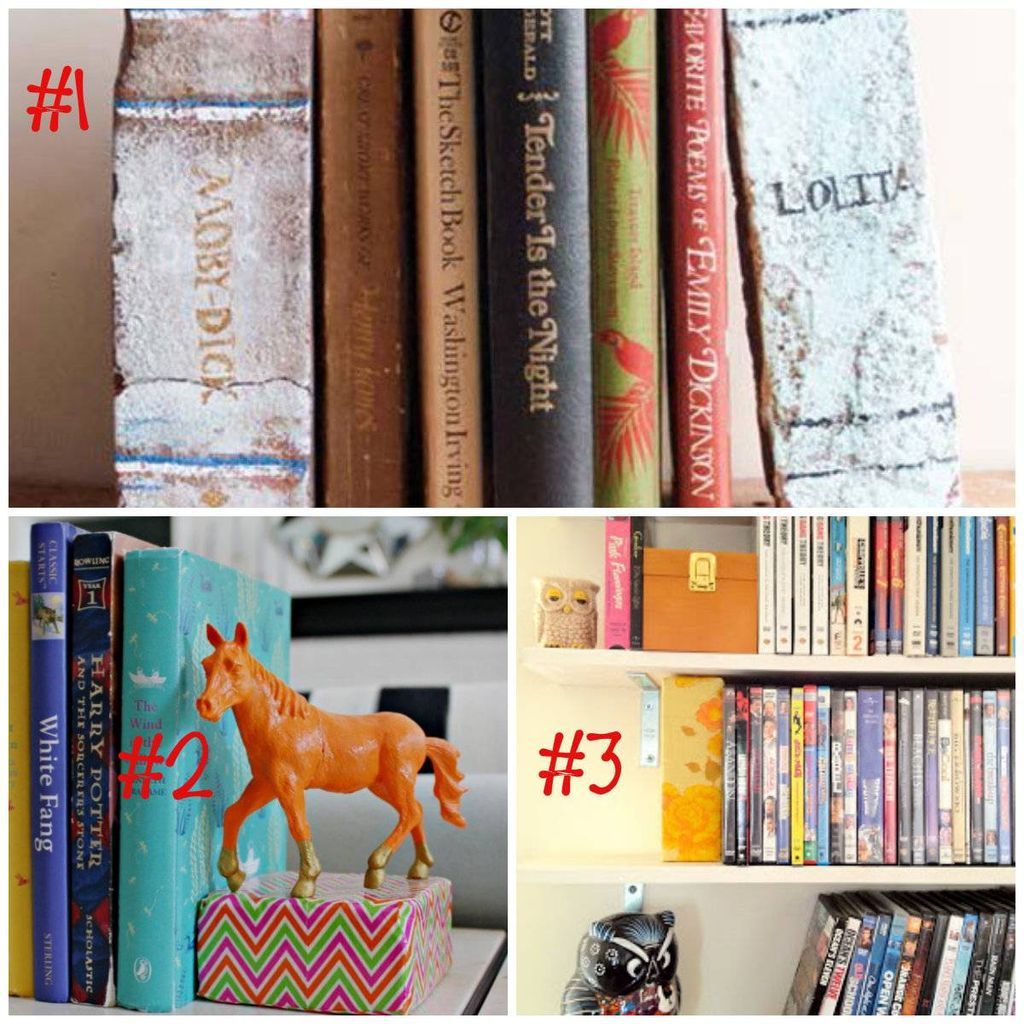
1. The bricks-painted-to-look-like-books option from Human Behavior
2. Plastic animals, paint, and duct tape from Hi Sugarplum
3. Wrap it in fabric from Button, Hook
Next up, I’ll hunt down some cool bookmark projects!


